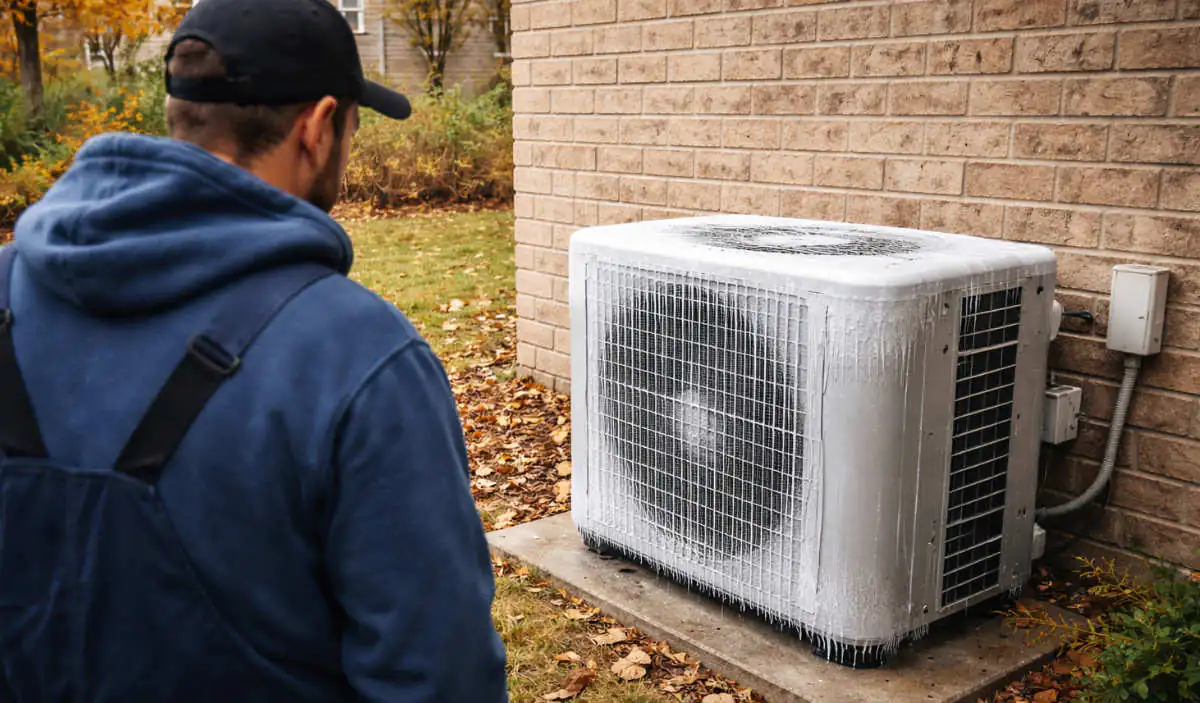
There's nothing worse than your AC suddenly losing its cool on a sweltering summer day. One of the most common culprits? Issues with the outdoor fan motor. This hardworking component powers the fan responsible for expelling all that hot air from the condensing unit. When it craps out, your system can't properly release rising temperatures.
Before shelling out big bucks for an AC repair call at the first sign of trouble, see if you can investigate the issue yourself first. This guide will walk through some of the most common outdoor fan motor problems, easy DIY fixes you can try at home, and indicators that it's time to wave the white flag and call in professional backup.
You'll also get useful maintenance tips to maximize this motor's lifespan and performance, so you're not a swing away from indoor infernos. Let's get started on extending your cool!
Common AC Outdoor Fan Motor Problems and How to Identify Them
When your outdoor AC fan starts acting up, there are usually a few telltale signs pointing you toward the culprit. Here are some of the most common outdoor fan motor problems to watch for, and how to identify them:
Motor Not Starting
If the outdoor fan won't start running at all when the AC unit kicks on, it likely indicates a failed motor preventing it from activating. This could stem from various causes like electrical issues, seized bearings, burnt windings, or other internal motor damage.
To identify a non-starting motor, first ensure the condensing unit is receiving electrical power by testing the voltage with a multimeter at the contactor, motor wiring, and capacitor terminals. If voltage is present but the motor still isn't activating, check for issues like capacitor failure, disconnected motor wiring, or bearing seizure preventing rotation. Listen for any internal grinding upon startup which signals bearing failure.
Overheating
Overheating is a serious issue that can accelerate damage to the fan motor's internal components like bearings and windings. This typically occurs when the motor is being overworked due to airflow restrictions, or there are failing components internally impeding heat dissipation.
To identify overheating, carefully pass your hand near the motor's outer housing during operation - if it feels excessively hot compared to normal temperatures, overheating is likely taking place. Also, inspect for any visible housing discoloration or burnmarks which are signs of extreme overheating. Restricted airflow leading to overheating can be diagnosed by checking for debris obstructing the condenser coils or fan blade pathway.
Noisy Operation
When operating properly, outdoor fan motors should run with relatively low noise levels. Suddenly noticeable loud buzzing, groaning, squealing, grinding, or rattling sounds are usually the first signs of an impending failure.
To identify noise issues, first turn off the AC unit completely to remove power from the motor for safety. Then locate where the sounds are emanating from - the motor housing itself, fan blade area, or nearby components. High-pitched squealing frequently indicates worn bearings, while grinding points to a lack of lubrication or bent/misaligned components creating excessive vibrations and friction.
Fan Blades Not Spinning
It's possible for the motor itself to activate and run, but an internal disconnect prevents the fan blade assembly from turning properly. This inhibits vital airflow needed for the condensing process.
To check for a spin issue, you'll need to visually inspect the full rotation of the fan blades during operation through the unit's protective grating. If the blades aren't spinning at all or seem to be stuck or rotating erratically, it suggests the motor shaft or bearings aren't effectively transmitting motion. This requires checking internal components.
Intermittent Operation
Intermittent or erratic outdoor fan operation where it cycles on and off or struggles to stay running consistently often points to an electrical fault. Common culprits include failing run capacitors or electrical shorts in thermostat wiring.
You can identify intermittent issues by running the AC system and closely monitoring the fan's behavior over an extended period, as the faults may be intermittent. Have a helper cycle the system power off and on while you listen and watch for the fan's struggle to restart consistently. Inspect the run capacitors for bulging, leaking, or burn marks. Check thermostat wiring for any pinched or frayed spots that could cause a short.
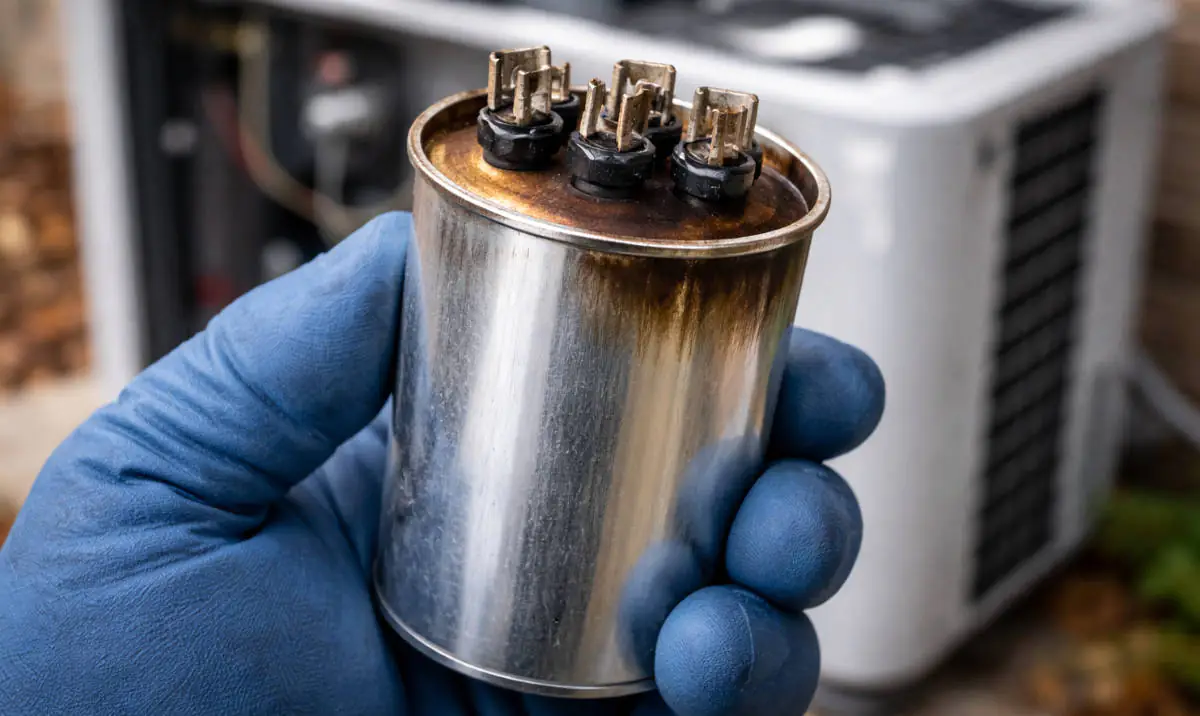
Capacitor Problems
The run capacitor and sometimes a separate start capacitor provides fan motors an initial boost of torque to get the heavy blades spinning, then supply a constant current while running. When capacitors degrade, the motor strains or fails to start.
Bad capacitors can often be identified visually by checking for bulging, leaking, or scorch marks on their cylindrical surfaces. You can also dismount capacitors and test their microfarad ratings with a multimeter against specifications to identify degraded performance. On startups, listen for struggling fan blades that could indicate capacitor failure.
Electrical Connection Issues
The outdoor fan gets its power supply through various electrical connections carrying voltage from the condenser contactor switch through the run capacitor to the motor wiring. Any disrupted power due to loose, burnt, or corroded connections can impede fan operation.
Start by shutting off power completely, then give all the electrical connections a visual inspection - look for any wiring that has pulled loose, or shows signs of corrosion or heat damage creating a poor connection. Use a multimeter to test for full voltage passing through each connection point to identify any voltage drops.
Worn Bearings
Inside the fan motor's housing are small ball bearings that allow the internal shaft to rotate smoothly and freely. As these bearings gradually wear down over years of operation, they place increased drag and friction on shaft rotation.
You can often identify bearing wear by the sounds coming from the motor housing - grinding, growling, or continuous rumbling noises despite no visible obstruction to the fan blades spinning. Bearing damage at an advanced stage may render the shaft's motion extremely labored or fully seized, preventing operation entirely.
Burnt Motor Windings
The wound copper wiring within a fan motor's housing is called the windings - when electrical current passes through these coils, it generates the spinning force to turn the motor. As windings deteriorate or burn out from excess heat and age, the motor loses torque.
A telltale sign of burnt windings is an acrid, ozone-like, or electrically burnt odor emanating from the motor housing during operation. You may notice visible signs of the windings themselves turning brown or becoming burnt. Multimeter testing can detect windings experiencing electrical shorts. Severely damaged windings require full motor replacement.
Dirty/Clogged Fan Blades
While not a direct motor issue, excessively dirty outdoor fan blades that become clogged with built-up debris like cottonwood, leaves, or grass can place tremendous strain on the motor trying to turn them. Airflow disruptions of any kind compromise motor performance.
Identifying clogged blades is as simple as a visual inspection - take a look at the fan blade assembly itself for signs of packed debris covering the blade surfaces or stuck between them. Buildup can prevent smooth, unencumbered rotation. Be sure to cut all electrical supplies before attempting careful cleaning of any debris.
Incorrect Motor Speeds
Outdoor fan motors have defined rpm operating speeds they're designed for based on factors like cooling tonnage, blade size/weight, and desired airflow volume. Wiring the motor for higher or lower speeds than intended overstresses internal components.
Check the fan motor's model specifications to confirm its designated full and half load speeds. Then inspect the actual control wiring diagram on the equipment itself to ensure it's wired for those defined speeds. Any mismatch, even briefly operating at incorrect high speeds, accelerates component failures.
Identifying which specific issue is plaguing your outdoor fan requires some simple investigation. Once you pinpoint the root cause, you can determine the best repair strategy!
DIY Repairs on Common Outdoor AC Fan Motor Problems
While some outdoor AC fan motor issues require the expertise of an HVAC professional, there are quite a few common problems you can safely troubleshoot and repair yourself with basic tools and precautions. Handling these DIY fixes can save you the costs of service calls for minor maintenance.
Cleaning Clogged Fan Blades
One of the easiest DIY repairs is clearing away any visible debris buildup on the fan blades themselves that could be impeding airflow and straining the motor. Simply cut power to the condensing unit, then carefully use a soft-bristle brush or compressed air to dislodge stuck-on dirt, leaves, grass clippings, etc.
Replacing Capacitors
If inspection reveals the run capacitor is visibly bulging, leaking, or testing confirms it's providing insufficient microfarads, replacement could restore proper motor operation. After verifying power is disconnected, simply discharge residual energy, disconnect the old capacitor's wiring, and swap in a matching replacement secured at the same locations.
Tightening Electrical Connections
Loose or corroded wiring connections that aren't allowing full voltage through to the fan motor are another common DIY fix. With the power disconnected, check all screw terminals, wire nuts, and plugged connections for signs of oxidation or looseness. Tighten any loose connectors and clean away visible corrosion.
Adjusting Mechanical Tensions
In some cases, improper mechanical tensions generate friction and bind the motor shaft and bearings. Following diagrams, you may be able to safely access adjustment points to properly tension and re-center the shaft position within its mounts using set screws. This alleviates grinding noises.
Cleaning & Lubricating Bearings
If caught early before total failure, applying a few drops of proper lightweight electric motor oil on accessible bearing points may restore smoother shaft and bearing rotation. Accessing bearing points often requires dismounting the motor assembly and exercising caution to avoid excess lubricant.
Rewiring for Correct Speeds
If your fan motor is wired for RPM levels inconsistent with its sizing and tonnage ratings, adjusting the control wiring diagram to the manufacturer's specifications can prevent excessive component stress. This should only be attempted by those fully comfortable reading wiring diagrams for their specific system.
Of course, safety always comes first, especially when working around electrical components and moving parts. If any repair seems out of your realm of DIY experience, don't hesitate to call in the professionals to avoid any accidental damage or injury.
When to Call The Professionals
While DIY fan motor repairs can save you money for basic maintenance, there are many scenarios where it's wisest to call in professional HVAC technicians rather than risk further damage or safety issues. Here are some instances when you'll want to opt for the pros:
Failed Motor Replacement
If your outdoor fan motor has completely failed due to burnt windings, seized bearings, or other internal damage, replacement is the only option. This requires proper motor sizing, dismounting the full assembly, and intricate re-wiring best left to experienced techs.
Capacitor Diagnosis Issues
Sometimes intermittent outdoor fan issues can make it difficult to diagnose whether aging capacitors are truly the root cause. Professionals have experience troubleshooting further with tools like capacitor analyzers to test and verify failures.
Electrical System Concerns
Any concerns about broader electrical system issues like your condensing unit's contactor switch, circuit boards, thermostat wiring faults, or high voltage levels should have a certified tech's oversight for safety.
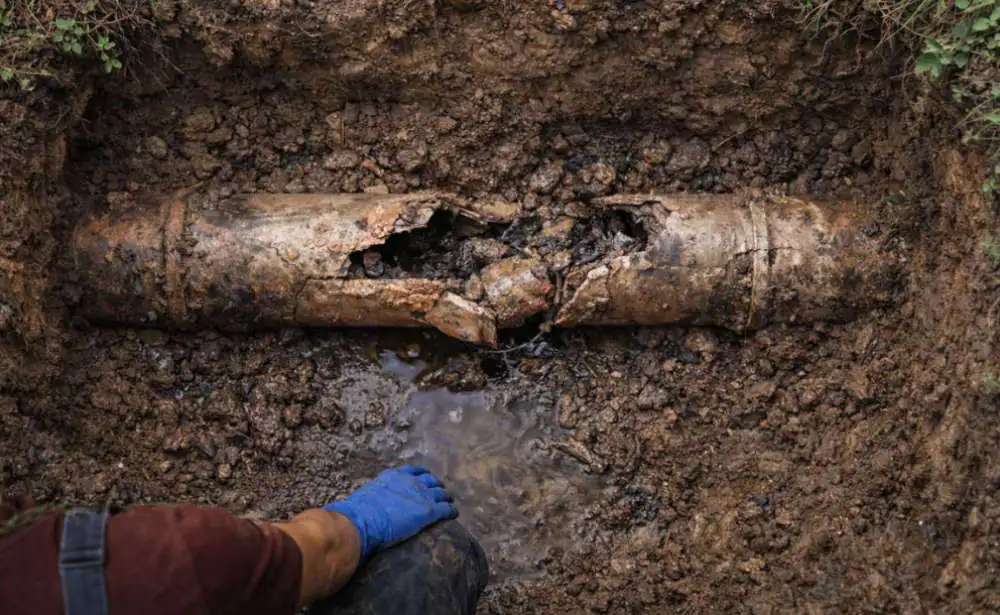
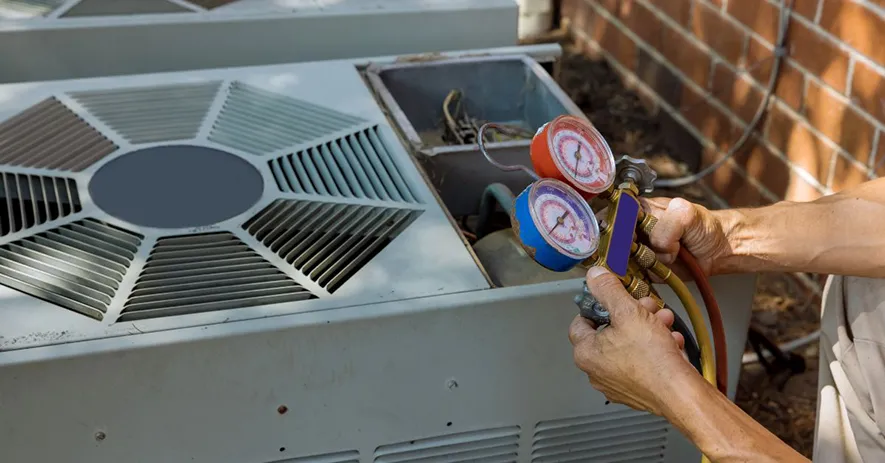
Refrigerant Circuit Problems
While capacitors and motors are common DIY repairs, any suspected issues within the AC's refrigerant loop like Freon leaks, pressure problems, or compressor failures require an EPA-certified heat transfer specialist.
Inaccessible Components
Some condensing unit designs make it difficult or impossible to safely access certain components like motor bearings or mounting hardware without special tools and disassembly knowledge professionals have.
Backdrafting Concerns
If you suspect backdrafting issues where exhaust gases may be recirculating into your system's airflow supply due to fan problems, this is an urgent safety scenario requiring immediate professional diagnosis.
Cost of Mistakes
Before attempting any repair, honestly assess your experience level working on AC equipment. The potential cost of incorrect DIY repairs that lead to irreversible damage, leaks, or complete system replacement may outweigh cheap part fixes.
When in doubt, opt for the experience and liability coverage of a certified HVAC technician. They have the proper equipment, training, and access to order precise replacement parts for a permanent fix done right the first time.
Maintain Your Chill with Proper Outdoor Fan Care
As the long, hot summers drag on, the last thing you want is for your home's air conditioning system to break down due to an outdoor fan motor failure. Proper preventative maintenance and timely repairs help ensure you can maintain a steady stream of cooling comfort.
When outdoor fan issues inevitably arise, handle what you reasonably can through safe DIY inspection and basic fixes. But don't hesitate to call in professional reinforcements from Sunset Heating & Cooling for any repairs that make you uncomfortable or involve the replacement of major components.
For over 100 years, Portland-area homeowners have trusted Sunset's certified HVAC technicians to properly diagnose, repair, and maintain all aspects of their cooling systems - including those hardworking outdoor fan motors. Their team has the experience to get your indoor chill restored quickly and correctly the first time.
Don't let lingering outdoor fan problems escalate into disastrous breakdowns. At the first sign of issues, take action by calling Sunset Heating & Cooling at (503) 500-5866. They'll make sure your AC is primed to keep you and your family comfortably cool all summer long!